
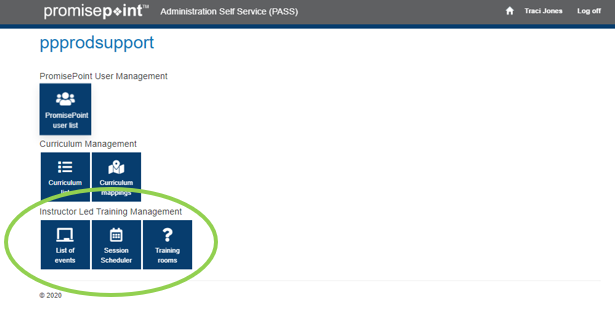
Instructor Led Training is a module in PASS that allow PASS Administrators with ILT roles to manage ILT tasks.
PASS’s ILT module includes options:
- List of events – this is where a PASS administrator with an Event role can create classes.
- Session Scheduler – this is where a PASS administrator with a Session admin role can schedule sessions (the classes)
- Training Rooms – this is where a PASS administrator with the Session and Training rooms role can schedule/manage sessions and set up training rooms.
This guide shows how to create an event, a facility and training room, a session and how to manage the roster:
How to create an event (aka Class):
- Click on the option List of events
This takes you to the Events page where a PASS administrator with the Event role can create an event (class).
NOTE: Any PASS admin with an ILT role can see the list of events.
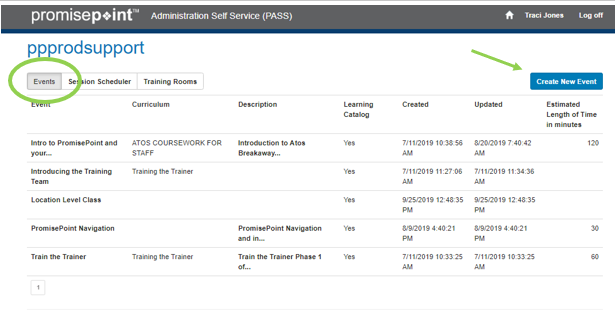
2.) To create an event, click on the Create New Event button in the right upper corner of the page.
The Create New Event: box will display:
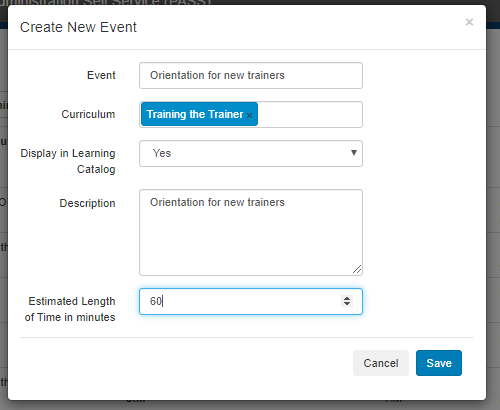
3.) Key in your values:
- Event - key in the event name.
- Curriculum - select a curriculum if desired. If a curriculum is keyed into this field, it will be requirement on the student’s learning.
- Display in Learning Catalog - select yes or no. If yes, the class will be available to choose from the learning catalog when it’s scheduled.
- Description - key in a description if desired.
- Estimated Length of Time in minutes - key in how long the class should take in minutes, if desired. This will help for Session admins who are scheduling the class to know how long it should be scheduled for.
4.) Click, Save.
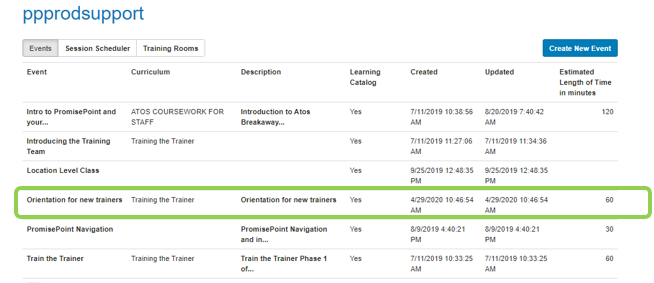
The event is now listed and can be selected when scheduling classes in the session scheduler:
NOTE: Events can’t be deleted but they can be overridden with new names.
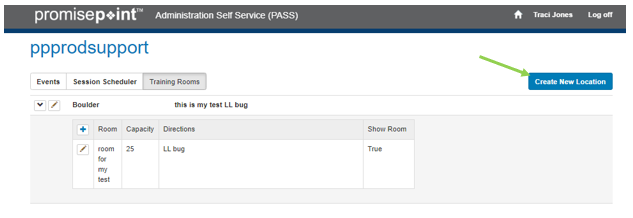
How to create training rooms:
1.) From the events page, click on Training Rooms, or select it off the PASS home menu.
The Training Rooms page opens and will display any Locations/Facilities and rooms available.
A PASS administrator with a Session and Training rooms role, can click Create New Location:
The Create Facility box displays.
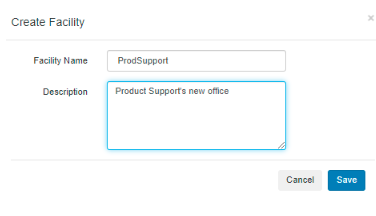
2.) Name the facility in the Facility name field, and any additional description needed
3.) Click, Save.
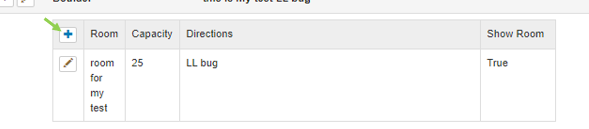
4.) Once the Facility is created, you can create the room/s, by clicking the plus signs underneath it:
The box Add Room displays:
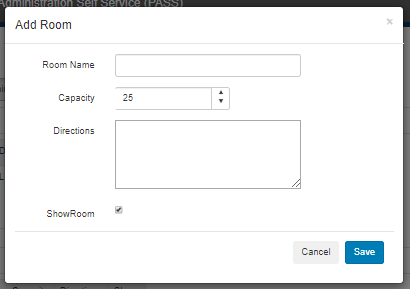
6.) Key in the values for the room:
Room Name – the name of the room
Capacity – How many seats are in the room (if this is a virtual room the # cannot be updated)
Directions – How to find the room, or description
ShowRoom – Check the box if you want to display the room on session scheduler and if you want to be able to select it when created the session.
7.) Click, Save.
Editing a session (room capacity)
NOTE: You can only lower room capacity to the highest session capacity (set among any sessions using that room).
How to create a session
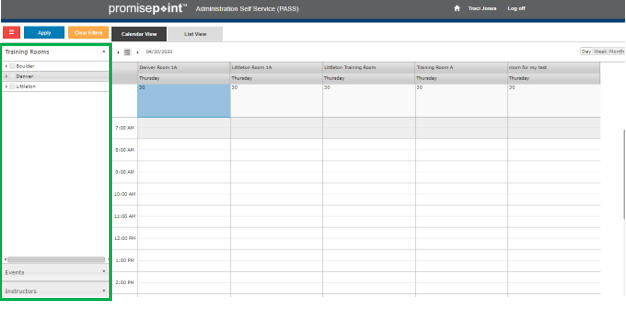
1.) Click on Session Scheduler from the training rooms page or select the option from the PASS home page.
Session Scheduler will open, ready for you to create your session.
NOTE: The left side of the pane shows the filters that can be applied: Training Rooms, Events or Instructors. It defaults with the training rooms section open (though session scheduler has no filters when first accessed).
2.) To begin, you may use the date filters or select the date and time on the cell. To open the session window double click on the cell or click once and right click.
The Create Session window displays:

3.) Key in your values:
Event - Choose the class you would like to create the session for
Location/Room – If necessary, choose the Location and Room
Session Capacity – the room may be at a larger capicty than the class, but the class can never be larger than the room
Date/Time - range and time of class, if necessary
Status – if the class is closed (no one can enroll in it)
Instructor – if there is one
Facilitator – if there is one
Class Notes - if desired
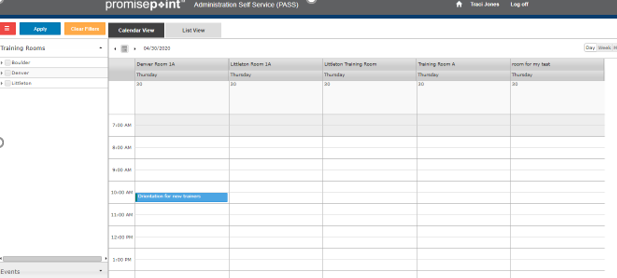
4.) Click, Save.
5.) Click, Close.
You will see the class session on the session scheduler that has just been created:
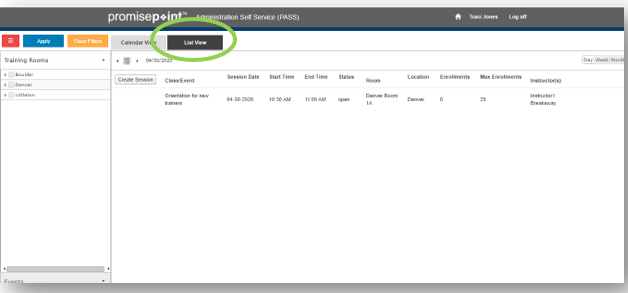
NOTE: You may click on list view, to see the session listed, and work at creating and managing sessions from the list.
Enrolling Student to class (aka Managing the Roster)
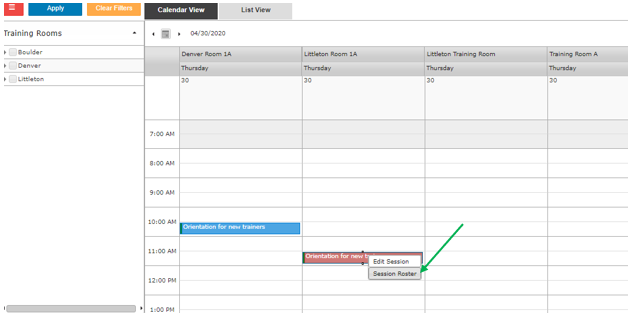
1.) From the Session Scheduler, right click on the session you want to enroll a student in:
The Roster displays:
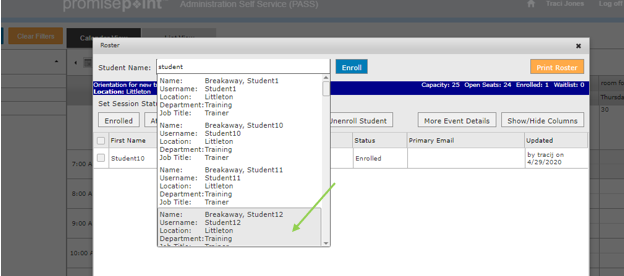
2.) In the Student Name field, select the student to enroll by starting to type their name in the field and then click on their name when they display in the list:
3.) Once selected click Enroll:
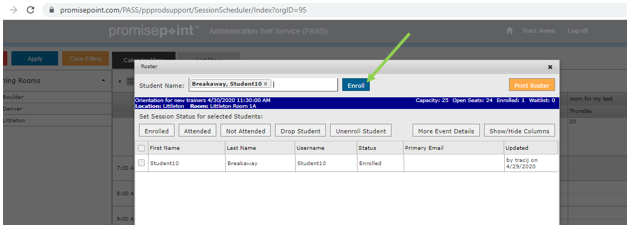
They will then show on the roster as enrolled:
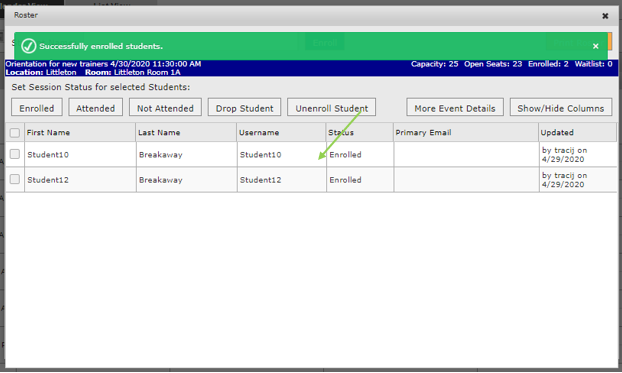
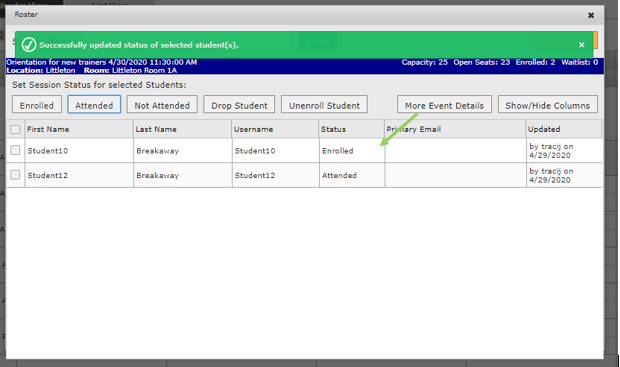
4.) Once Enrolled, the student can be managed by checking the box next to their name, and selecting from the options above:
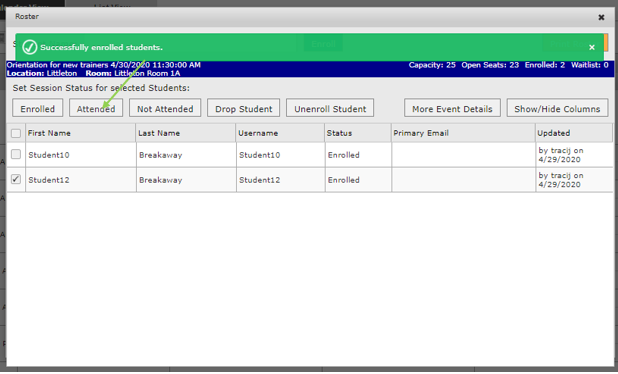
The new status for the status will be displayed:
NOTE: When the student signs into PromisePoint, and accesses their learning, they’ll see the class in with the status:
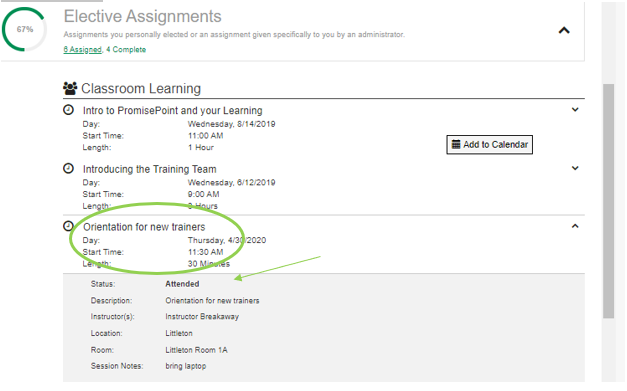
NOTE: In this example, the reason the class is in the elective section of the student’s learning is because it wasn’t included in a curriculum.
0 Comments